Setting Preferences by selecting the Setting menu option on the Ribbon Menu, will have the effect of setting those parameters for the next design object (doors, windows, walls siding and Roof) added to the design. There will be NO impact on the design objects that are already on the Plan View. To change the current design objects on the Plan View, the Modify menu option should be used.
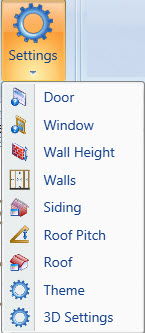
Door
| • | This option allows you to change the size/style/type of door in the garage structure, using the Door Selection dialog. The size/style/type chosen in that dialog will affect doors to be placed in the structure after the selection is made. |
Window
| • | This option allows you to change the size/style/type of window in the garage structure, using the Window Selection dialog. The size/style/type chosen in that dialog will affect windows to be placed in the structure after the selection is made. |
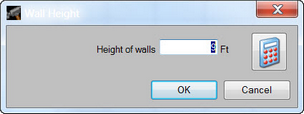
Wall Height
| • | This option allows you to set or change the wall height for the garage structure, using the Wall Height dialog. Enter the desired value directly into the field or use the keypad, which is accessed by clicking the icon to the right of the field, and click the OK button. |
Walls
| • | This option allows you to change the parameters for walls in the garage structure, such as stud size, stud spacing and foundation parameters, using the Wall Parameters dialog. All fields in this dialog use inches as the unit of measure. After all desired values have been entered, click the OK button. |

The following values can be entered through the Wall Parameters dialog:
| ➢ | Stud Size: Specify the desired size for boards that run vertically from the foundation up; the primary structure of the walls. |
| ➢ | Minimum Small Header Size: Specify the minimum size for the head of a small entryway (Overhead support for doorways made for the passage of a person). |
| ➢ | Minimum Large Header Size: Specify the minimum size for the head of a large entryway (Overhead support for doorways made for the passage of vehicles and other objects that would not fit through a smaller door). |
| ➢ | Minimum Large Header Length: Specify the desired minimum length for the head of a large entryway. |
| ➢ | Minimum Double Cripple Width: Specify the desired minimum width for cripple studs (boards that are back-to-back and provide extra support in places under heavy load where bowing might otherwise occur). |
| ➢ | Stud Spacing: Specify the desired spacing between studs. |
| ➢ | Foundation Height: Specify the height of the portion of the garage foundation where the base plate will be attached. |
| ➢ | Foundation Width: Specify the width of the portion of the garage foundation where the base plate will be attached. |
| ➢ | Bid Studs at Actual Length and Bid Cripples at Stud Length: The number of studs and/or cripples will be calculated by linear foot rather than the number of studs. |
Siding
| • | This option allows you to change the parameters for walls in the garage structure, using the Siding By The Inch Parameters dialog. All fields in this dialog use inches as the unit of measure. After all desired values have been entered, click the OK button. |

The following values can be entered through the Siding By The Inch Parameters dialog:
Sheet Overlap: Specify the amount of overlap of siding to prevent leaks between sheets of material.
Gable Truss Offset: Specify the offset from the top of the roof to the top of the gable end truss.
Drip Edge Length: Specify the length of overhang of roofing materials from the end of a roof, which prevents rain
Upper Offset: Specify the offset of siding from the top of the wall.
Lower Offset: Specify the offset of siding from the ground.
Roof Pitch
| • | This option allows you to change the parameters for walls in the garage structure, using the Roof Pitch dialog. The roof pitch can be entered one of three ways: |
| ➢ | Directly into either of the fields (the first field is rise over run and the second field is the number of degrees). |
| ➢ | Using the keypads, which can be accessed by clicking the icon to the right of the desired field. |
| ➢ | Using the slider to the right of the graphical representation of the roof pitch. |
| ➢ | After all desired values have been entered, click the OK button. |

Roof
| • | This option allows you to change the parameters for the roof in the garage structure, such as sub fascia size, truss spacing and ladder frame spacing, using the Roof Parameters dialog. All fields in this dialog use inches as the unit of measure. After all desired values have been entered, click the OK button. |

The following values can be entered through the Roof Parameters dialog:
| ➢ | Sub Fascia Size: Specify the minimum size of boards and components under the exposed fascia. |
| ➢ | Joist Size: Specify the minimum size of boards that provide primary support for the whole roof. Joists run horizontally and attach to the tops of the walls on both ends. |
| ➢ | Minimum Rafter Size: Specify the minimum size for the platform for roofing materials and main components of the roof. |
| ➢ | Ladder Framing Size: Specify the size for extra framing between rafters. |
| ➢ | Rafter Spacing: Specify the amount of spacing between rafters. |
| ➢ | Joist Spacing = Rafter Spacing x: Specify the spacing between joists, based on spacing between rafters. |
| ➢ | Gable Frame Spacing: Specify the spacing for boards that run vertically in the gables to provide support to the rafters. |
| ➢ | Ladder Frame Spacing: Specify the spacing between any extra framing between rafters. |
| ➢ | Split Joist Overlap: Specify the overlap of wood in cases where two pieces of wood must be joined to form one joist. |
| ➢ | King Post Bracing Size: Specify the size for the post that runs from a joist to a rafter, which provides extra support for roof loads. |
| ➢ | Allow 2 piece Joist: Specify the type of joist desired; either a single joist for the length of the garage, or if a joist made of two pieces of wood is allowed. |